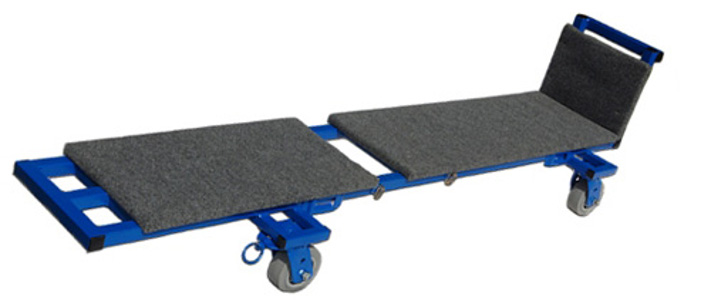
A piano moving board (or skid board) is the secure base for every piano move. They are usually outfitted with the proper divots in order to secure your straps around your piano during the move. They are then easily rolled out onto a dolly which makes the transportation of the piano immensely easier.
Skid boards can be really expensive when you are trying to do a do-it-yourself (DIY) move. Fortunately, they can be made at home and be used for future moves.
Here is the DIY guide for creating your own piano moving board!
Step 1: Selecting the Right Plank
6 foot is the most common size for making a piano skid board. However, the size of plank you are going to be needing really depends on the size of your piano and the amount of leeway room you are going to want.
It is important to add an end cap to the board to prevent the piano from sliding when it is being lifted onto the dolly. Make sure you get extra wood for this specific use! The best way to attach the end-cap is to bolt it into the main plank of wood.
Step 2: Add Padding to the Piano Board
A moving pad or blanket is what movers will use to prevent any cosmetic damages to the piano.
Acquire one of these and get a staple gun to attach the pad to the skid board. Wrap the board so that the part where the piano will be placed is completely wrapped. Staple the remaining fabric to the underside of the board with a staple gun.
Make sure to stretch the pad over the board, so there is no extra fabric that will gather as the piano is being moved on the skid board. This is a crucial step in order to keep your piano on a soft surface and won’t cause any damage to the piano.
Step 3: Add Permanent Straps to the Piano Board
Adding permanent straps to your skid board is optional, but serves the purpose of stabilizing and securing the piano.
By adding the straps you will be able to easily secure and lock the piano into the board. You can just as easily use straps that are not attached to the board and wrap the whole piano board when strapping it in. The ratchet straps are the best for this, so you can have the piano strapped in as tight or loose as you want it to be.
If you do decide to attach permanent straps, then staple the straps to the bottom of the board and make sure that there is enough room to wrap around the entire piano on each side and secure it down!
Have any questions during the process? Give us a call for further assistance.
About West Coast Piano Moving & Storage
We always recommend using professional movers when handling and moving pianos. In the case of DIY, there are always options to save money and to make sure you have a safe move! Hopefully, this DIY piano board guide will help you in your moving endeavors.
At West Coast Piano Moving & Storage, our team of certified and licensed movers is readily available to move your piano to and from Portland and Seattle – safely, securely, and in an efficient amount of time! We also have a climate-controlled piano storage facility that is monitored and perfect for combating against potential wear and tear from humidity and temperature drops. Contact us today for a free consultation.
I would like to get an estimate on moving my grand piano (Chickering) from Los Angeles (zipcode 90045) to Folsom, CA (zipcode 95671), a distance of about 350 miles. There are no steps at the pick-up location or destination. At the destination, the piano will be stored in a clean, dry garage, and stay wrapped in moving blankets and attached to its piano board.
I am a professional musician and have seen my piano moved many times. This contract will not go to the cheapest company, but to the company that knows how to do this job correctly. Thanks.
Hello Christopher! Thanks for commenting, please get in touch with our certified moving consultants for an estimate!